Post to Instagram Via Your Respage Apartment Social Media Dashboard This July!
Starting this July, Respage users will be able to schedule Instagram posts through their social media dashboards.
We’re extremely excited to give our users a convenient way to manage one of the largest social media sites in the United States, and eager to help you get started. That’s why we put together this quick guide for properly setting up your apartment instagram page. To get started, please take a minute or two to read over the following directions:
Establish a Business Page
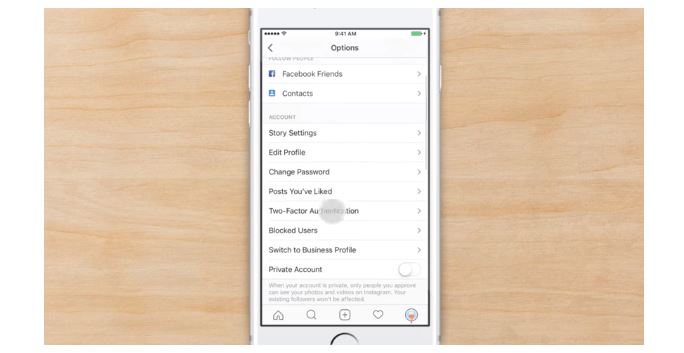
The new Instagram posting feature is only compatible with Instagram Business Profiles. It will not work with personal accounts. Luckily, changing over to a business page is simple two step process:
 Step #1
Open the Instagram app and head to your account settings. You’ll see an option towards the bottom of the screen that reads “Switch to Business Profile.” Tap it. (Note that you may need to change your profile to public, as Business pages cannot be private.)
Step #2
After tapping the Switch to Business Profile button, you’ll be prompted to verify your business information. Simply update the relevant fields, and that’s it. You’re the new owner of an Instagram Business Profile!
Reconnect Your Accounts
Once you’ve established your Instagram Business Page, Contact our team at support@respage.com with your Instagram logins. It’s also important that you make sure we have access to the Facebook account associated with your Instagram account. Once our team receives your logins and access to the Facebook account associated with your Instagram, you’re all set.
Schedule Your Posts
Once our team has connected your account, you’re ready to start scheduling posts! Instagram scheduling works just like the scheduling tools for your other Respage connected social networks. Simply upload an image to the system and add description text if you want a caption. Click Add To Queue and you’re done!

